Condition Monitoring – Don’t Have Stored Fuel Without It Part 1
This summer we hosted a webinar called Condition Monitoring for Stored Fuels. During the webinar we explained what condition monitoring is and the...
8 min read
Erik Bjornstad : Oct 25 2018

This summer we hosted a webinar called Condition Monitoring for Stored Fuels. During the webinar we explained what condition monitoring is and the key elements of condition monitoring, why it’s important, and how you should be doing it. You can watch the recording of the webinar here, or you can read the transcript in this five-part series.
Now, what is condition monitoring, really? At its heart, when we refer to 'condition monitoring,' we are talking about methods that we can use to detect any changes in the condition of our stored fuel and the storage tanks that might hint that there's something wrong. Excuse me. And at the heart of most of these kinds of changes in the conditions of stored fuel, are fuel microbes. That's why we've been talking about fuel microbe biology so much up to this point.
Now, let's say we go looking for microbes. We suspect there's a problem; we go try to detect microbes. But whatever, by whatever method we use, we don't end up finding any, so to speak. Most often, when we go looking for microbes, and there's actually microbes in the tank, but we don't find any, in other words, we get a false negative; there are microbes in the bank but whatever detection methods we used didn't find them. Most often, in situations like that, these microbes go undetected because of either incorrect sampling procedures or incorrect testing procedures or some combination of the two. And out of the two, sampling is probably the greater problem of the two.
So, detecting microbial contamination in mission-critical stored fuels starts with good sampling. That's what it starts with. Now, let's talk about human nature for a moment, right? When it comes to things like fuel testing and trying to detect problems, people always assume that whatever they chose to do, that it's going to tell them what they want to know. They assume that whatever test they chose is the right one to do. It's kind of like the psychological phenomenon that people like to be told that they're making good decisions, right?
And people assume when they're sampling to try and find microbes, they assume that whatever sampling that they're doing is an accurate representation of the actual condition of their storage tank, you know, the place that the samples came out of. So, this speaks to what we said earlier, and we're going to repeat it again, and we will probably repeat it again later; where and how you sample controls what you're able to detect. It controls what you see.
Now, how do you get fuel samples? I don't know how many of you out there work specifically for like C-stores and gas stations, but most commonly in the business world, where they're trying to sample some stored fuel, most often fuel samples are collected from dispensers, right? And why? Well, because it's fast, it's easy to do, and it gives you a nice, good-looking fuel sample that's perfect to do fuel quality testing on.
Notice we said 'fuel quality testing,' that means stuff like testing the fuel specifications, testing the cetane rating of fuel, testing the flashpoint, the water and sediment content; all those kinds of things that are important tests that have to be done because they're part of ASTM D-975, so they are important, but what we have to realize is that a dispenser sample is not good for doing microbiological testing. And if you're relying on a dispenser sample to test for and detect microbes, you're not going to have a representative sample. You're not going to find any, most likely.
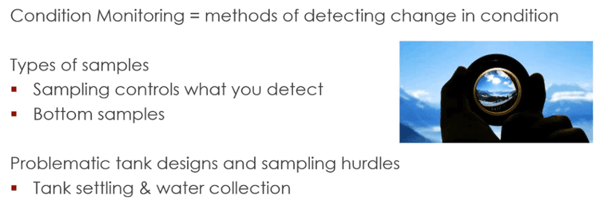
So, if you're going to detect microbes, you can't use a dispenser sample. You have to get a bottom sample. But even if you get a bottom sample, it's still, you know, surprisingly easy to get a bad bottom sample that won't give you accurate results. So, what we're going to talk about is basically how to get a good one. That's the bottom line.
Now, what is the one thing that goes hand in hand with microbial content in stored fuel? What's the one thing that is most closely linked to finding microbial content? Well, the answer to that is free water content. So, if you're doing condition monitoring, and you're trying to scout out a possible microbial presence in a storage tank, then by necessity you're going to be looking to see if there's any free or even any emulsified water content. But when you're trying to do this, there's one big thing that's completely out of your control that can make it hard for you to do that successfully; and that is the design of the tank itself.
People who do like fuel polishing and tank servicing, they know that there's a number of different kinds of tank designs, many of them have baffles and certain design elements that make it really hard to find all the water that may be present in the tank, not to mention the fact that a tank can actually settle when it's put in. Meaning, when you have, when you put in an underground storage tank, the regulations dictate that the tank is supposed to be what they call 'trim by the fill end.' What that means, it's either supposed to be level, or it's supposed to be slightly lower on the fill end so that any free water that develops will roll down toward the fill end. And the filler end is the end that's typically the easiest to access. That's where most commonly you find the access points for a given tank.
However, because of their weight, tanks don't always cooperate with these regulations, right? Typically, they will settle into the backfill that they use, and then they will settle in certain ways that cause the water to collect in certain ways. Like, for example, they can settle, they can become trim by the turbine end, which is the opposite of trim by the fill end, so they can do what's called sagging, where the center of the tank actually becomes lower than the ends of it. That makes water pool into certain areas of the tank. You can have a situation, what they call a 'hogging' situation, where the ends of the tank are actually lower than the tank's center line, which again, makes the water pool in different other ways.
Now, how are you going to know if a tank fits any of these descriptions? You're not. You really don't have a reasonable way to know that. So why does that matter? Well, all of this speaks, first of all, it speaks to the truth of how much potential variance there can be between what's appearing on our sample and what's actually going on in the storage tank. Because if you sample for water in your storage tank and your storage tank has settled in a way where the water's not actually where you're sampling, it's somewhere else in the tank, you're going to pull a sample, and you're going to say, "hey, no water, great!" When in fact there's more than enough water in another area of the tank to support any number or any amount of harmful microbial presence.
Now, without a good sample, it is pretty much impossible to know if your test results or the testing that you're going to do, it's pretty much impossible to know if those results are going to actually reflect the reality of the situation. So that's why it's really, really important to get a good sample. But what defines a good sample? Well, I just actually answered my own question. I said, 'what defines a good sample?' A good sample by definition is one that accurately reflects the condition of the environment it came from.
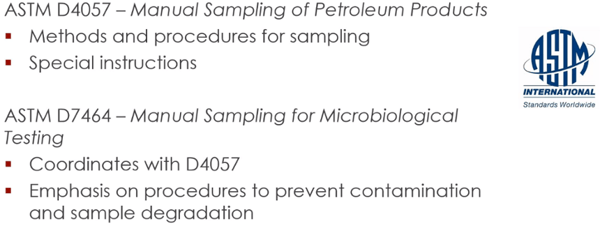
But a secondary question is 'who defines, who tells us how to get a good sample?' Well, the gold sample for this is, or are the ASTM standards. And there are two standard guides that speak directly to sampling and handling. First one is ASTM D-4057, and the second one is, as you can see on your screen, is 7464. Now 4057 is the standard practice for the manual sampling of petroleum products. And it gives a lot of good information on how to best collect fuel samples if you want to do specification testing, like fuel quality characteristics. It's like 49 pages long; it talks about all different things, kinds of sampling apparatuses and kinds of instruments that can be used to pull your samples, where you want to sample in the tank, and how to do it.
All sorts of things like that, even special instructions like for example, if you're pulling a sample to do flashpoint or water and sediment testing, you actually want to minimize the transfers, the numbers of transfers from containers, because the more you transfer a sample, the more potential variance there can be in those results. Well, people don't tend to think about stuff like that. Those are the kind of recommendations that are in ASTM D-4057. Now, it is 49 pages long, so it covers a lot of detail, but the problem is it does not cover special issues that have to be taken into consideration if you want to test for microbes in the fuel. And for that reason they created 7464, which is the standard test method for manual sampling of liquid fuels for microbiological testing.
This is the gold standard that instructs sampling methods if you intend to do microbiological testing, and it covers a lot of interesting things in there; talks about not just where to sample and how to sample using the different kinds of sampling ... apparatuses, but it talks about things like the importance of sterilizing your equipment and cleaning your equipment. And how to do surface samples and things like that. And a lot of, it does actually refer back to 4057 a number of times, so it's really designed to be used alongside 4057.
So, if you have to do a lot of sampling, and if you don't have this already, I would recommend getting copies of those so that you can be familiar with what the best practices are. So, if you're familiar with both of those, you'll have some excellent guidance for doing the job properly in your hands.
Now Bill wants to know if we sump water from the tank will the microbes be concentrated enough for a valid sample; we'll touch on that at the very end. I think there's a good answer to that question.
Now, where you pull your samples from is pretty important. Remember, your sample dictates what you see, right? And if you pull a sample from an area of the tank that does not have a microbial presence in it, then your sample's going to tell you-you don't have any microbes. It's going to give you a false negative. So ideally, we want a sample from places where they actual microbial presence is most likely to be.
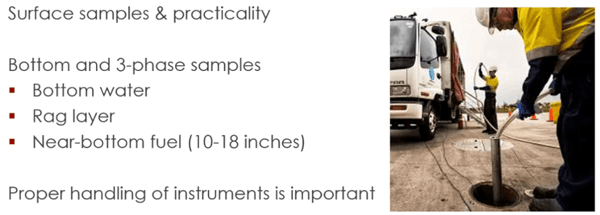
Now, where is that? Well, we said earlier that microbes prefer to live on solid surfaces within the biofilm. So it stands to reason that in order to have the best sample you would want to do a surface sample. However, and this is where we start to meld theory with practice, right? It's rarely practical to actually get a surface sample in a tank. And we know that. So the alternative is to get a bottom sample. And if you're taking a bottom sample, ideally you want to get what they call a three-phase sample. That means that your sample is going to have some of the bottom water from the tank; it's going to have some of the, what they call the 'rag layer,' which is microbial, you know, the microbes and the biofilm and biological stuff that tends to amass at the interface, in between the fuel and the water. The bottom water, rag layer, and then you want to get what they call 'near-bottom fuel.' Which ideally is the fuel that's about between 10 and 16 inches above the water phase.
Now, if you're going to get fuel that's 10 to 16 inches above the water phase, that means you have to know how high the water phase is, right? So that means that you need to check for water beforehand. Before you start the test. And that's usually easy enough to do; you use water paste and a tank stick or sounding tape, that's a pretty easy way to determine the height of your water phase, and then you know where you need to, from a vertical standpoint, where you need to take the sample from.
Now, you also want to make sure while you're doing this, that you sterilize your sampling tools. Because if you don't, it's very easy to cross contaminate your samples. Now, how do you sterilize the tools? Well, the old school method, the old school method would be dip the tools in alcohol and then flame them to sterilize them. But I don't know anybody who's going to be doing that around the fuel storage tank. And the D-7464 says basically that too. So, if you can't flame them, then the alternative to that is to use a 70% or 80% alcohol solution. And you rinse the sampler, you know, two or three times before you start taking your sample. And the last thing on this, but something that might be missed, you want to, if you're going to use something like a funnel to transfer your fluids, you want to make sure that that is sterilized as well.
So sampling's pretty essential to getting an accurate a picture of the realities of your storage tank as possible. And again; we have a tendency to believe that what we see before us is actually reality. So it's important to have good testing methods, number one, and then properly understand what they may or may not tell us if we are to have an accurate picture of what's going on.
This is Condition Monitoring Part 3. You can read Part 1 here, Part 2 here, and Part 4 is here.
Watch the full presentation below:
This summer we hosted a webinar called Condition Monitoring for Stored Fuels. During the webinar we explained what condition monitoring is and the...
This summer we hosted a webinar called Condition Monitoring for Stored Fuels. During the webinar we explained what condition monitoring is and the...

This summer we hosted a webinar called Condition Monitoring for Stored Fuels. During the webinar we explained what condition monitoring is and the...